Florida Holiday

So here we are on holiday in the USA. A day late because our flight was delayed courtesy of Hurricane Matthew, but safe and sound nevertheless.

We’ve been travelling up the east coast of Florida from Miami, and the further north we travel the more apparent is the storm damage – it’s not complete devastation, but lots of destruction to trees and quite a few roofs have taken flight – so we decide to stay the night at Stuart, a small town on the SE Federal Highway, and then head inland to Lakeland.

Naturally, I’ve been on the lookout for quilt shops along the way, although i did promise myself I would only be looking for pattern books rather than fabrics (like that’s ever gonna happen!)

On Highway 1, at Sebastian, I discovered Marilou’s Quilting and Sewing Center. Marilou herself wasn’t there at the time, but we met a really helpful guy, a US Forces veteran, whose name sadly escapes me. (It’s my age, what can I say?)

He showed us around a well stocked store filled with beautiful fabrics and a long arm quilting machine in the centre loaded with a lovely quilt top in the process of being quilted. A large seminar room in back housed some state of the art Husqvarna machines, and was already occupied by ladies hard at work on their sewing and embroidery.

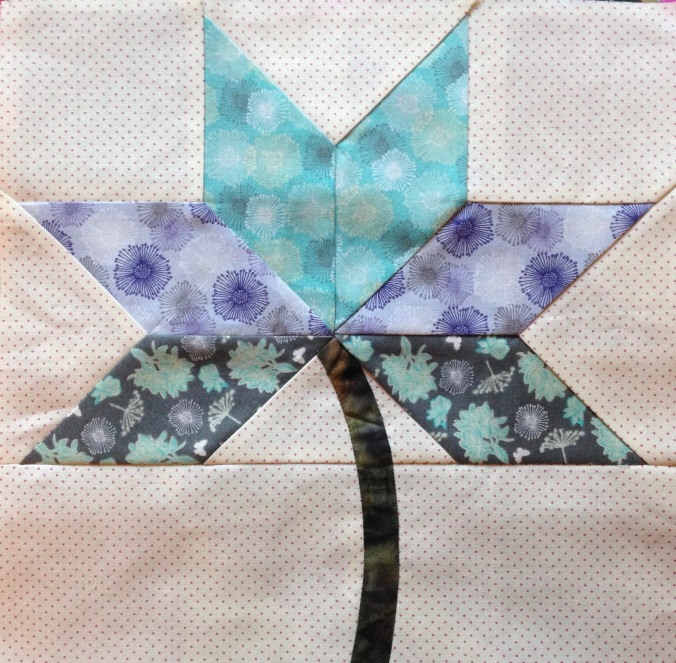
I bought a Stars Across America pattern book by Eleanor Burns, and of course, several gorgeous fat quarters. (You can just see them in the foreground of one of the images below.)

…link to Florida Holiday II

… link to Florida Holiday III

Advertisement

A Memory Quilt for Len

Irene and Len are longtime friends of Angie’s mom, and Angie herself knows them well. Sadly, Irene passed away at the beginning of this year.

It’s a special time in the grieving process when a surviving partner can bring themselves to part with their spouse’s much loved possessions, but now Len has begun to quietly rehome some of her chattels where he thinks they may do most good. Irene was a seamstress of the old school and, knowing she is also a sewist, Len has given a bewildering collection of fabrics and notions to Angie along with an impressive old sewing machine.

Angie told us all about this at one of our regular sewing group get togethers. She then showed us a lap quilt she has made from the plaids and tweeds she unearthed in the donated fabric stash. She plans to give it to Len soon to keep him cosy this coming winter. I cannot think of a more wonderful way to commemorate Irene than the thought that has gone into the making of this beautiful memory quilt.

Summer Progress

While Angie’s been relaxing at her Welsh hideaway she’s been catching up on her hand sewing. She really is a wiz with English paper piecing and uses up all her offcuts making hexagons and such, so it’s economical too. I think it’s a great way to make the most out of every scrap of leftover fabric and the results are just beautiful.

Not to be outdone, Tracy has completed a pretty quilt top. It’s just two colour ways in shades of white and turquoise and looks really effective. I can’t wait to see her finished quilt.

Over the last few weeks we’ve been busy making lots of small work, like bookmarks, pouches and little baskets, which we hope to sell at upcoming fundraising events in aid of Cancer Care and MacMillan Nurses. This little project is ongoing so I’ll post more about it as we progress

I’ve finally finished the binding around my vanity sewing case. I’m not all that happy with the result as the top and bottom tend to bow inwards. Again, I think it’s all to do with the foam batting which seems to have a life of it’s own.

I’m in the process of making some fabric bins so I can conceal the piles of batting and interfacing I’ve amassed. I decided to use a different technique with the remainder of my foam stuff. I cut the batting half an inch smaller all round than the size of the fabric, so that when I brought the sides of the bin together I just had to stitch through only the fabric to secure them. To add strength and definition I rolled the seam allowance in on itself at each side and covered it with a binding. The bin still bows out a bit, but I think it kinda works.

Currently my waddings are jammed in plastic carrier bags and stuffed under the sideboard. It’s not a pretty sight. I intend to make some floppy lids to top off the bins later, but for now I’ve just covered my first one with a piece of fabric. I have to say it already looks much better, so I best crack on with a couple more.


…link to All is Vanity

My Travel Bag

Chastened by the fact that Tracy had completed her brilliant bag in record time, I decided I’d better hunker down and get on with making my own travel bag. The pattern I had was the Overnight Bag, an original design by Julie-Anne from White Cottage Country Crafts.

I love the overall size and shape of the bag but there were a couple of things I wanted to add. The first was some internal pockets, and the second was to give addional strength to where the handles fasten to the body of the bag as I’ve a tendency to stuff my travelling bags to the gunnels. To achieve this I decided to sew the handle strapping all the way down the outsides of the bag to the base seams so as to spread the load.  As an afterthought, I got hold of some plastic D rings and sewed them on with fabric tabs just below the zip on each side so I can attach a shoulder strap if I want to.

Overall, I’m pleased with the way it turned out. All I have to do now is apply some spray-on fabric protector and I’m good to go.

A Little Bit of History

I take in museums and places of interest all the time when I’m on holiday, but I never seem to get round to visiting the ones that are near my home.  I live in the Black Country, once the industrial heartland of England, whose grimy factories were built on the rich seams of iron ore and coal found beneath the earth in the 1800s. There are plenty of places here that celebrate the legacy of those times and that I’ve never been to. One of them is the Museum of Cannock Chase.

The museum mostly celebrates the lives of the coal miners and the mining industry. Our little sewing group found it fascinating although we didn’t visit because of the exhibits but because the venue was hosting the Cannock Chase Quilt & Embroidery Festival.

It was an enchanting little festival with a beautiful collection of quilts on display, all made by local enthusiasts. Considering it was the first time the festival was being held there were a surprising number of fabric and notions stalls too.

I purchased some needles from a stall run by John James Needles of Redditch and discovered that the company has been producing high quality needles of all types since the 1840s, and Redditch was once know as the ‘Needle Capital of the World.’ All made possible by the high quality steel being manufactured close by in the Black Country.  Small nuggets of history like that become kind of personal when they’re so close to home, don’t you think?

Angie and I succumbed to purchasing a few bits of fabric which we didn’t need but absolutely had to have. Tracy bought a complete handbag kit, ‘The Juberry Messenger Bag,’ designed by Julie Betts from the Juberry Fabrics stall. She got to work on it straight away and the end result is a fabulous looking bag that only took her a couple of evenings to complete. Which reminds me I’d better get on and make my travel bag soon. I bought the fabrics at Uttoxeter way back in April and haven’t even made a start yet.

All is Vanity

Angie and I attended a workshop at White Cottage Country Crafts a week or so back.  I do love our ‘away days’ where it’s all about the sewing and there are none of the usual interruptions you find at home.

It’s such a boost when you know there’s someone around to help you with the tricky bits and bolster your confidence when you’re not quite sure on how to go about something.

We can choose a new project or continue with one already started. This time we both chose the same new project – a vanity sewing case. It’s an original pattern by Louise who was also the person presiding over the workshop that day so we thought we’d made a wise choice.

The pattern itself was pretty straightforward and I loved the look of the finished item pictured on the front. We had problems sewing it together though, but this was down to either our choice of wadding or our inability to handle it properly.

We used a foam wadding which does give the vanity case a great shape, it stands up really well, but oh my did we find it hard to sew with. In places I was trying to go through four layers of the stuff plus fabric and lining, and my little machine was really complaining about it. Even though I used a fresh needle, I got skipped stitches galore and had to keep going back to re-stitch gaps – no fun. If I hadn’t had the use of Angie’s machine (the super duper one) to help me finish up I might have given up completely.

If anyone can tell me what machine adjustments are needed to effectively sew through several layers of foam wadding I’d be eternally grateful. Otherwise I think I’m going to avoid the stuff altogether in the future.

After all the hassle I didn’t have the energy to wrestle with machine sewing on the bindings, nor the confidence to think it would work, so I’m in the middle of hand sewing them on for now. That’s slow going too because there’s plenty more things I’d rather be sewing to distract me.

Angie was so unhappy with her finished case she’s relegated it to the back of an upstairs cupboard, never to see the light of day again and certainly not to be photographed! She’s currently working on a new and improved version. Needless to say, she’s not using the foam stuff either this time.

I’ll post pictures in the gallery when we’re finally done with them.

…link to Summer Progress

Angie’s Album Quilt

I’ve been waiting for this little beauty to be finished so I could photograph it. The blocks were done, but Angie was waiting to find just the right shade of fabric for the large outer border. I think the deep mauve she eventually decided upon is perfect. It really brings out the soft muted colours of the centre pieced blocks.

The quilt is the Album Quilt, and is a lap quilt taken from a pattern in Kathleen Tracy’s book, The Civil War Sewing Circle. Quilts evoking this period of American history are Angie’s absolute favourite to do.

Since the blocks are the stars of the show, she’s sewed a minimal amount of echo quilting so as not to detract from them. I have to say I simply love it, and it’s definitely a pattern I must get around to trying for myself.

Westering Women BoM 2016 II

I think it’s fair to say that Barbara Brackman’s Westering Women BoM Block 3 has been the cause of major headaches for our little sewing group! The block is called Sweet Gum Leaf and, oh joy, it calls for a whole lot of inset, or ‘Y’ seams.

I tried and tried to get good matching points, but I guess this is where my inexperience shows as I couldn’t come up with a block that really satisfied me. Practice is supposed to make perfect I know, but my best effort remained my first try, the others were all downhill from there.

IMG_0651

Sandra – WW Block 3

At our Friday night get-together I was relieved to find it wasn’t just me that was having problems. So, we put our heads together and came up with an alternate design using only HSTs. It’s not quite as elegant as the original but it’s manageable, achievable and it gets the job done.

Button was being her adorable self and insisted on getting in on the act too – she’s a stern supervisor. (You might notice that Angie and Tracy haven’t quite got round to appliquéing the stems onto their blocks yet, so I had to use a piece of stand-in fabric for the photos!)

A few days later I felt in a more relaxed frame of mind to tackle those dreaded inset seams, so I chose a whole new colour scheme and spent an afternoon carefully cutting, marking and sewing pieces to make the original Sweet Gum Leaf block. I was so pleased with the outcome, until…..

IMG_1149

Sandra – WW Block 3 Version 3

…..I compared it with my previous blocks and discovered that I’d cut my six leaf pieces without the addition of the quarter inch seam allowance. So although the block worked, it was a miniature version of what it should be. Talk about frustration!

It was another week before I could bring myself to have yet another crack at it. Thankfully, this time everything went well and I have a passable block, but it’s going to be a long time before I approach inset seams without thinking about sweet gum leaves.

IMG_1135

Sandra – WW Block 3 Version 4

In the meantime, Blocks 4 and 5 in the Westering Women series have been published so there’s quite a bit of catching up to do.

…link to previous Westering Women BoM 2016 post.


Stars ‘n Stripes II

I’m pleased as punch at the way my Stars ’n Stripes quilt has turned out. I made it as a lap quilt, but as it’s to go in the cab of an old Chevy truck, I sewed some fabric triangles into the top two corners, so it can be hung up for display if wanted. One things for sure, I’ve had plenty of practice at HST’s now.

I finally found a starred fabric on the internet with the right depth of blue, and the fabulous backing fabric was a lucky find at one of the shows we’ve been to recently. I think it fits in well with the whole flag theme.

It’s only 50” by 35” but it’s the biggest quilt I’ve completed so far. Anyhow, now it goes into a cupboard to keep hidden until my other half’s birthday at the end of July. I do hope he likes it.

Link to previous Stars n Stripes post

Tracy’s Chevron Quilt

Tracy completed her beautiful Chevron Quilt just in time for our Friday night reveal this week.  I think the bold chevrons and sherbet candy colour prints give it real zing. The finishing touches she’s added to the corners are so cute, especially the little appliqué heart.

I’ve only ever done stitch-in-the-ditch myself, but I think that the echo quilting lines Tracy’s used alongside the seam edges are very effective and make the chevrons stand out well so it’s something I’ll definitely have to try for myself.

The flange binding is another technique I like since it not only adds a pretty raised detail, but also saves having to do any hand sewing because it’s attached to the back of the quilt first then folded to the front and machine sewn again .  What’s not to like about that!